Duplicating a product in Woocommerce
or Clone a product in WoocommerceThe Title and The Permalink
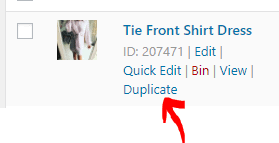
Once the Duplicate Page has been created, Edit the Title and then click save draft

Check the permalink has changed to the title with dashes in between each word to make the web address unique 
If the permalink hasn’t changed then edit the permalink ensuring there is a dash/hyphen between each word and then click OK

The Description and the CATEGORY
Replace the description with something that will be meaningful for your customer
The Category
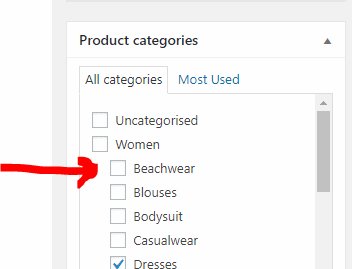
Then scroll down the product and head over to the right hand side of the product where the category section is.
Choose an Existing Category
Either search through the categories and choose an existing category that the product matches too or create a new category.
Create a new category
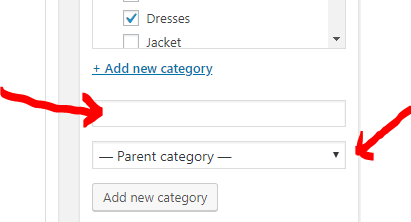
If you need to create a new category then click on “Add new Category”
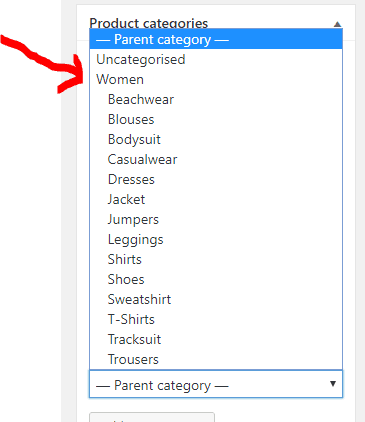
Enter the name of the category and then decide whether it should be the child of a parent category.
For example, the parent category for a fashion shop would be woman or man and the child category would be skirts, dresses, trousers etc
Once completed click on “Add new category”
you will then also need to follow this tutorial to add this category to the menu. (this will open in a separate window).
The SEO TITLE, The SLUG and The META Description
The YOAST SEO Title
Move back over to the left hand side and click on the SEO Title field with %% in it at the beginning Change this something like [the name of the product, a short description to sell the product, and then the name of your website. e.g Tie Front Shirt Dress – Beautiful Evening Dress – My Clothing Website Remember this will be how your post will look on the results of a search in Google, Bing and Yahoo search engines 
The SLUG
DO NOT DO ANYTHING TO THIS – You have already set this at the beginning and there is no need to change anything
The META Description
The Meta Description is what shows underneath the SEO title in the Google, Bing and Yahoo search engines and should contain a great description of the item that you are selling.
Then close the Snippet editor
Removing a Gallery Image
Hover over the current pictures and a cross will appear, click this cross to remove the current images.
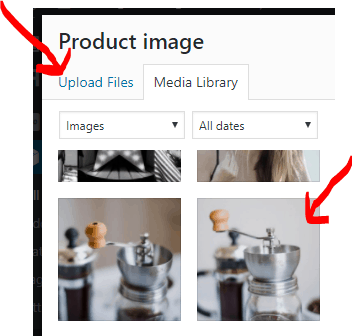
After you’ve removed the picture, simply click on ‘Add Product Gallery Image’ to upload your new images from your media library.
Product Data
For the Variable Product, choose the + button to see the full description of how to amend this area If you want to change this to a simple product then follow the Product Data – Simple Product tutorial below
Product Data - Variable Product - Click the + button for the Variable Product Tutorial
Product Data
Inventory
In this section, under Inventory you have the option to add a unique SKU number for your product, and set stock management levels so that you and your customers will be informed how many you have left of a particular product. You also have the option of allowing back orders or only allow a single item to be purchased within an order. 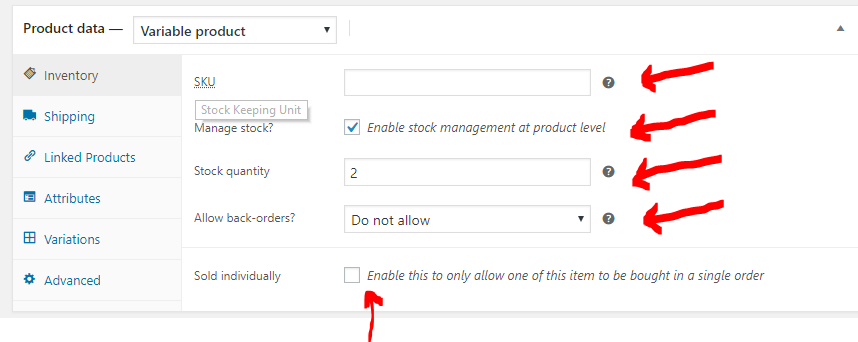
Shipping
In this section, you can add the weight, dimensions and shipping class to your product. 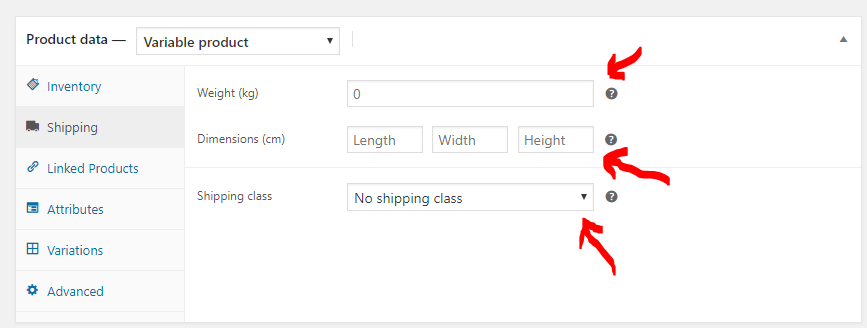
Linked Products
Under both Upsells and Cross-Sells, you have the option to begin typing the title of another of your producs that you would like to sell as an Upsell or a product that could accompany this product as a Cross-Sell. When the customer buys your product they then have the option to add more items to the basket that will compliment their order. 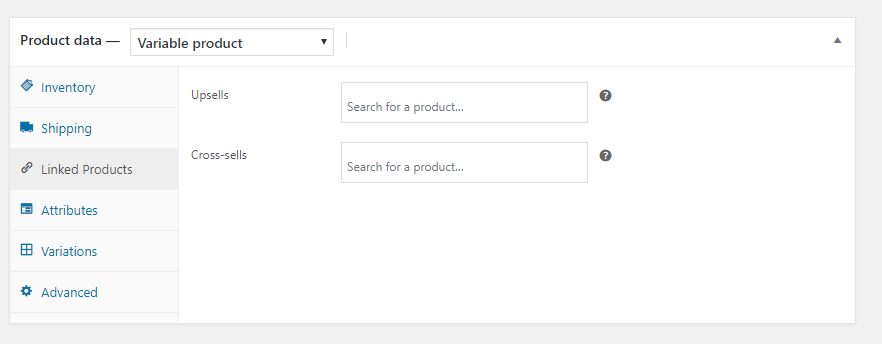
Attributes
Here is where you can set the attributes of a product e.g. Colour and then the colours that you have for that product like Pink or Navy. You can then set the sizes that you have available. So, the attribute would be Size and the values could be sizes, 8, 10, 12 etc. You need to use the pipe key | to separate the values though e.g. 8 | 10 | 12 | 14 Make sure the visible on the product page and used for variations options are ticked. Don’t forget to Save attributes at the end.
Variations
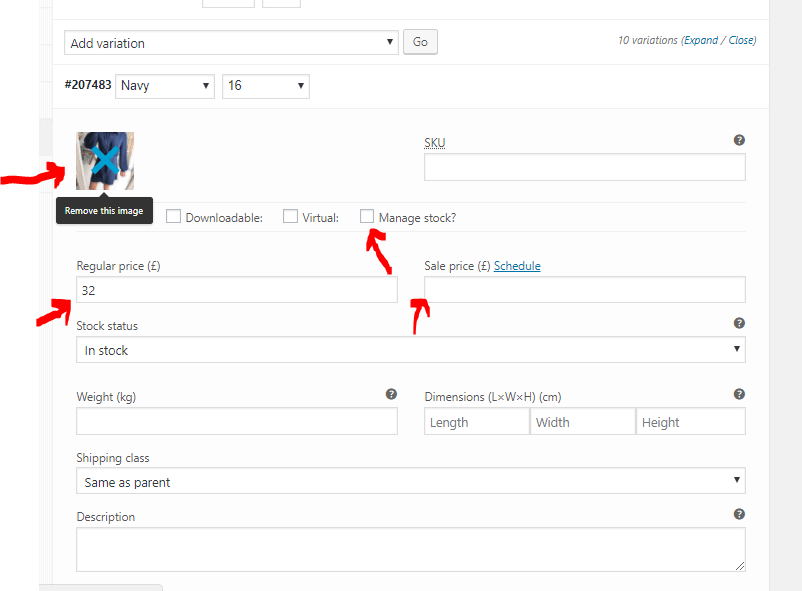
To remove the existing image, just hover over the image and click the X. You can then add a new image. Having set your attributes first, you can then set the price of the product if it differs from another colour or size. So, when a customer selects this size and colour, the price will reflect that option. Again, you can also manage stock at this level too.
Advanced
Under the advanced section you can add a Purchase note or set where the product appears in the menu order. Setting the Menu order at 0 will ensure that it appears first in the menu. You also have the option to allow your customers to review your products here.
Product Data - Simple Product - Click the + button for the Simple Product Tutorial
Product Data
General
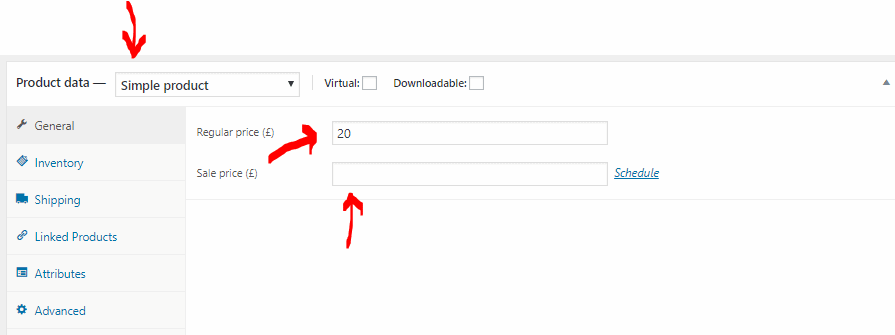
In this section, under General you have the option to add a regular price for your product, and Sale Price
Inventory
In this section, under Inventory you have the option to add a unique SKU number for your product, and set stock management levels so that you and your customers will be informed how many you have left of a particular product. You also have the option of allowing back orders or only allow a single item to be purchased within an order.
Shipping
In this section, you can add the weight, dimensions and shipping class to your product. 
Linked Products
Under both Upsells and Cross-Sells, you have the option to begin typing the title of another of your producs that you would like to sell as an Upsell or a product that could accompany this product as a Cross-Sell. When the customer buys your product they then have the option to add more items to the basket that will compliment their order.

Attributes
Here is where you can set the attributes of a product e.g. Colour and then the colours that you have for that product like Pink or Navy. You can then set the sizes that you have available. So, the attribute would be Size and the values could be sizes, 8, 10, 12 etc. You need to use the pipe key | to separate the values though e.g. 8 | 10 | 12 | 14 Make sure the visible on the product page and used for variations options are ticked. Don’t forget to Save attributes at the end.

Advanced
Under the advanced section you can add a Purchase note or set where the product appears in the menu order. Setting the Menu order at 0 will ensure that it appears first in the menu. You also have the option to allow your customers to review your products here.
Publish
Once all this is done, check over your completed product and click the Publish button *Please note that if you have created a new category you may need to add this to your menu and your shop page
Need a quote for a new website – Look at our packages below
Startup Website
Business Package
If you’re looking for a website that takes your business to the next level then the Business package is for you. Optimised for Search Engines, this is the best choice for any business.


